How to Mount Snowboard Bindings for Snowboarding Utah
Mounting snowboard bindings can seem like a daunting task if you’ve never performed it before, but with a proper introduction, it’s actually quite an easy thing to do in preparation for your snow season. In this tutorial, we’ll walk you through the step-by-step process to properly fasten your bindings to your snowboard for a safe, smooth ride on the mountain. Utah snowboarding is amazing but with bad bindings, you won’t get too far.
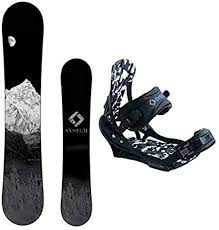
First thing’s first, you’ll need your snowboard handy, along with your bindings of choice, in addition to the required screws for the pattern your snowboard is built with. These can come in a variety of versions, including a 2×4 screw pattern with 12 holes on either side, a 4×4 pattern with 6 holes on either side or a somewhat star-shaped pattern, which is exclusive to Burton brand boards. Your board can also be set up with a Channel type binding slot, which involves just four screws, two for each side. These screws are in a channel and can be moved to the desired width for your snowboard stance. This was Burton’s way of making bindings easier to mount.
- Clean the board surface where you want the bindings
Once you’ve identified your binding configuration, it’s time to clean the top of your board, where the bindings will meet the surface. This is important because it will ensure that no dust or dirt will compromise the connection between your board and bindings, and so they’ll stay completely stationary during your ride. Any kind of spray-on cleaner or wipes, like Clorox wipes, should do the trick for this.
2. Prepare your materials
After you’ve cleaned your work surface, ensure that you have all your materials ready. This should include your board and bindings, the necessary screws for your binding configuration, a Phillips head screwdriver, and potentially a wrench, for fitting your bindings to your boots.
3. Placing the bindings
Place your bindings in your desired position (for beginners you should set up with both toes slightly facing away from each other 15 degrees for your front foot and 6 degrees for your back foot) doing this will ensure that you could ride both ways comfortably. Before screwing in the bindings make sure that feels right to you.
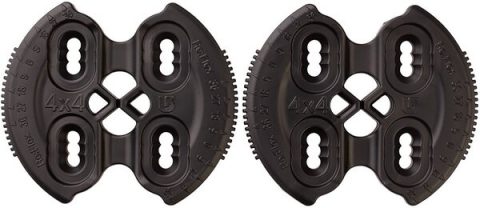
The discs above have notches with labels to tell what degree you would like. Start by screwing these in lightly with the bindings under and moving to the degree you feel comfortable with. Once you like the degree tighten the screws all the way. There should be no movement when wiggling the bindings.
3.5 For Channel bindings
Channel bindings are very different, you will start by popping off your channel lock normally located at the nose and tail of your board. (check out Burton’s way of putting on bindings) https://youtu.be/CJKQUniz1-I
From there you will slide just two screws in and place bindings on top. Do the same as traditional bindings except slide the desired width and degree before tightening.
4. Testing the board
After you screw in your bindings, and before hitting the slopes, test out how it feels on the carpet. Throw your boots on, strap in and lean towards the front and back. This will make sure the bindings are in the right position and are installed correctly with no loose screws